A garage floor coating is only as reliable as the concrete below it. If the slab is dusty, oil-soaked, damp, or covered in weak surface material, even a great-looking finish can lose adhesion over time. Knowing how to prep garage concrete means looking past the visible stains and treating the slab as the foundation of the entire project.
At Garage Floors 4 Less, preparation is not a quick cleaning step before coating. It is the work that determines whether your finished floor stays easy to clean, resists hot-tire pickup, and continues to look sharp through daily vehicle traffic, salt, moisture, and Canadian freeze-thaw conditions.
Start With an Honest Assessment of the Concrete
Before any repair or coating work begins, inspect the entire garage floor in good lighting. Look for cracks, pitting, spalling, old paint, tire marks, oil spots, and areas where the surface feels sandy or flakes under pressure. These are not merely cosmetic concerns. They can point to a weak concrete surface that needs to be removed or repaired before a protective system is installed.
Hairline cracks are common in garage slabs and are usually manageable when they are properly prepared and filled. Wider cracks, moving cracks, deep spalls, and uneven sections need a closer evaluation. A coating can protect concrete, but it cannot stop a slab from shifting or correct a structural issue below the surface.
It also helps to consider how the garage is used. A floor beneath a daily-driven vehicle faces road salt, water, hot tires, and occasional fluid spills. A workshop may see dropped tools, rolling equipment, and abrasion. A storage-focused garage may have fewer impacts but still needs protection from moisture and concrete dust. Preparation and coating specifications should suit the real demands of the space, not just its current appearance.
Check for Moisture Before You Prep Garage Concrete
Concrete can look completely dry while moisture vapor moves through it from below. If that vapor is excessive, it may interfere with adhesion and lead to coating failure. This is especially relevant for garage slabs built directly on grade, older homes, and areas with seasonal moisture changes.
A professional moisture evaluation provides more useful information than a simple plastic-sheet test. Plastic can reveal obvious condensation, but it does not measure the moisture conditions that matter when selecting and installing a coating system. We assess the concrete and use the results to determine the appropriate preparation and materials for the job.
Moisture concerns do not automatically mean a garage cannot be coated. They mean the system must be planned correctly. Skipping this stage to save time is one of the reasons bargain installations and rushed coating jobs can peel or blister later.
Remove Contaminants, Not Just Surface Dirt
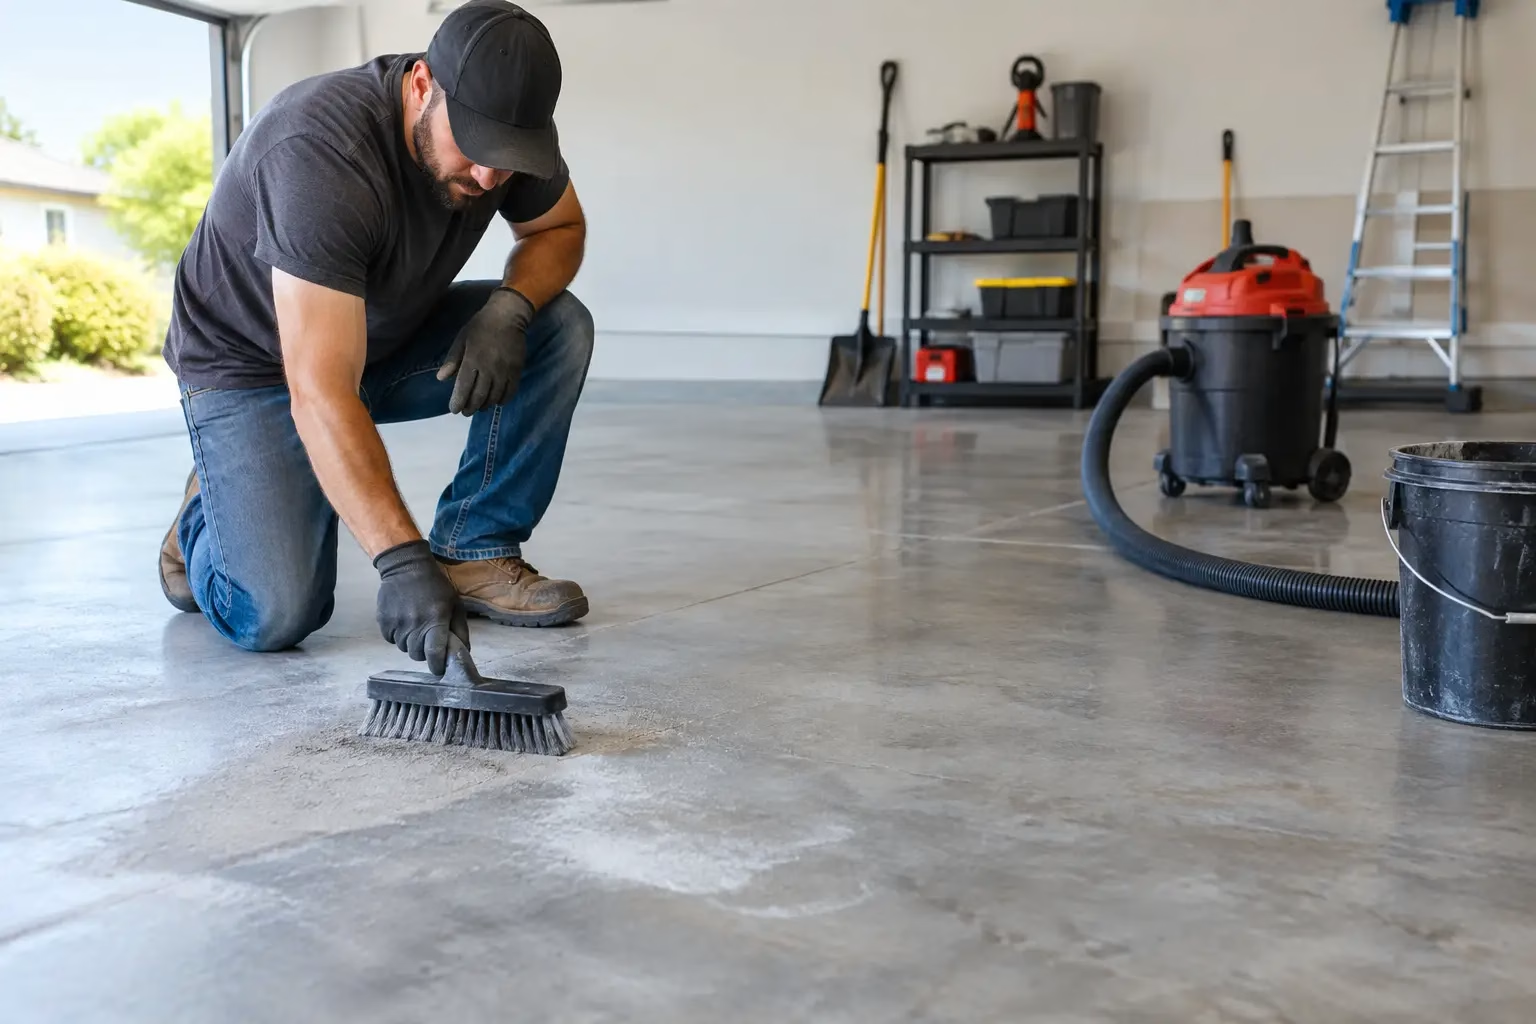
Sweeping a floor is necessary, but it is not concrete preparation. Dust, oils, silicone-based products, old sealers, and vehicle fluids can settle into the pores of the slab. A coating applied over contamination may bond to the residue instead of the concrete itself.
Start by removing everything from the garage, including shelving that sits directly on the floor where possible. Sweep thoroughly, then identify stains and suspect areas. Oil spots may require targeted cleaning and mechanical removal. Old paint, failed coatings, glue, curing compounds, and sealers must also be addressed because they can block penetration into the concrete surface.
Pressure washing alone is not a substitute for professional preparation. It can spread contaminants, introduce additional water into the slab, and leave behind coatings or weak concrete. Chemical etching also has limits. It may create a rougher feel on some floors, but it cannot consistently remove dense surface layers, hidden contaminants, or deteriorated concrete. It also creates a cleanup and neutralization process that needs to be handled correctly.
Repair Cracks, Pits, and Spalled Areas
Once the surface is exposed, repairs can begin. The goal is not to hide damaged concrete with a thick topcoat. The goal is to rebuild compromised areas so the finished floor has a sound, uniform base.
Cracks are typically opened and cleaned so repair material can bond inside them rather than sitting on top. Pits, chips, and spalled sections need loose material removed before they are filled. In some cases, the edges of a damaged area must be mechanically squared or feathered to create a durable repair instead of a patch that breaks down at the perimeter.
Repair work takes judgment. A small surface pit may need a simple patch, while widespread spalling could indicate that the slab has been exposed to repeated salt, moisture, or freeze-thaw damage. Addressing those conditions early produces a cleaner-looking floor and reduces the risk that defects telegraph through the final finish.
Diamond Grind for a Dependable Bond
The most important mechanical step in garage concrete preparation is diamond grinding. Professional grinders remove the weak top layer of concrete and create the proper surface profile for the coating system. This opens the concrete pores, levels minor inconsistencies, and gives the base coat a clean, mechanically prepared surface to bond to.
This is very different from roughing up a floor with a handheld grinder or relying on an acid wash. Large, professional grinding equipment keeps the profile more consistent across the floor, including high-traffic tire paths and areas near repairs. Dust-control equipment also matters. Concrete dust is fine, pervasive, and not something homeowners want moving through the garage and adjacent living areas.
The right profile depends on the coating being installed and the condition of the slab. Over-grinding can create unnecessary texture or expose aggregate, while insufficient grinding can leave a slick, weak surface that limits adhesion. This is one reason professional prep is not a place to cut corners.
Vacuum, Detail, and Protect the Work Area
After grinding and repairs, the floor must be vacuumed thoroughly with commercial-grade equipment. Dust left in cracks, along walls, or around the garage door threshold can compromise detail work. The crew should also inspect for missed contamination, loose repair material, and transitions that need further attention.
Preparation includes the surrounding space as well. Walls, cabinets, door tracks, and finished surfaces should be protected from dust and coating materials. If the garage will later include slatwall, cabinetry, or overhead storage, planning the floor and organization project together can help create a more polished result without unnecessary disruption later.
A well-prepared garage should feel clean, solid, and ready before the first coat is applied. The coating stage may move quickly, but it should never be used to conceal rushed repairs or poor surface preparation.
Choose a System Built for Garage Conditions
Conventional epoxy has a long history in garage flooring, but its slower cure time and sensitivity to UV exposure can create limitations for modern garage projects. A garage needs more than a glossy surface. It needs a system designed for temperature swings, moisture exposure, vehicle traffic, and daily cleanup.
Our FloorX2 Fusion+Nano® system uses advanced nanospartic coating technology and a full-flake broadcast finish to create a durable, attractive surface with practical performance benefits. It is designed for fast installation, resistance to hot-tire pickup, UV stability, and the changing conditions garage floors face throughout the year. The full-flake finish also helps disguise minor dust and everyday marks better than a plain painted-looking floor.
For many homeowners, one-day installation is a major advantage. Still, speed should come after preparation, never instead of it. A rapid installation only works when the concrete has been correctly assessed, repaired, ground, and cleaned first.
What Homeowners Can Do Before Professional Prep
Homeowners do not need to grind the floor or attempt repairs before a professional installation. In fact, DIY patch products, cleaners, and coatings can make the preparation process more complicated if they fail or leave residue behind.
The most useful step is clearing the garage as completely as possible. Remove vehicles, boxes, sports equipment, movable shelving, and items stored along the walls. Let the installation team know about known issues such as past water intrusion, previous coatings, significant cracks, or areas that regularly collect meltwater.
If you are planning a larger garage transformation, take the opportunity to decide where tools, seasonal items, bikes, and tires will go after the floor is complete. A protected floor is easier to maintain when the room has a practical storage plan.
A garage floor should not force you to choose between looks and long-term performance. The right preparation gives your coating a stable foundation, while the right system helps protect that investment for years of real use. Explore our Floor Visualizer to see possible finishes in your space, or request a free estimate from Garage Floors 4 Less and ask about our 15-year all-inclusive transferable guarantee.